Start a Library Inventory
Starting a library inventory is the first step toward accounting for all copies in your collection.
To start an inventory:
You can conduct either a full or partial inventory.
- Select Admin > Inventory.
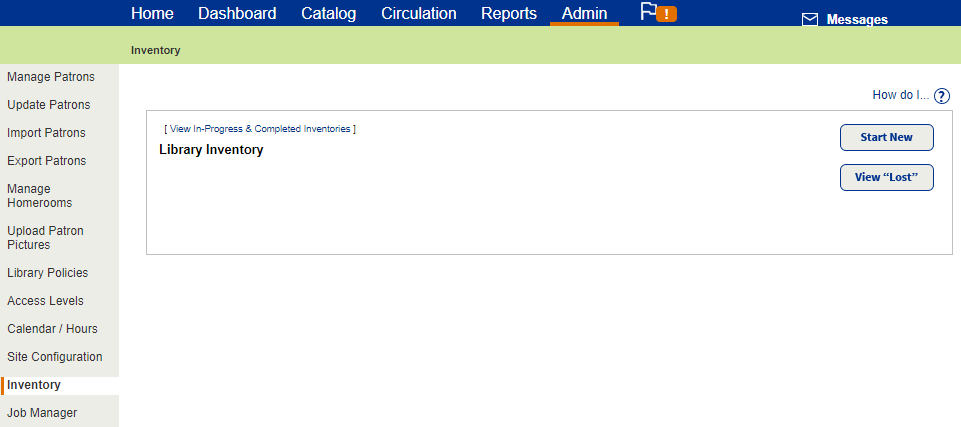
- Click Start New.
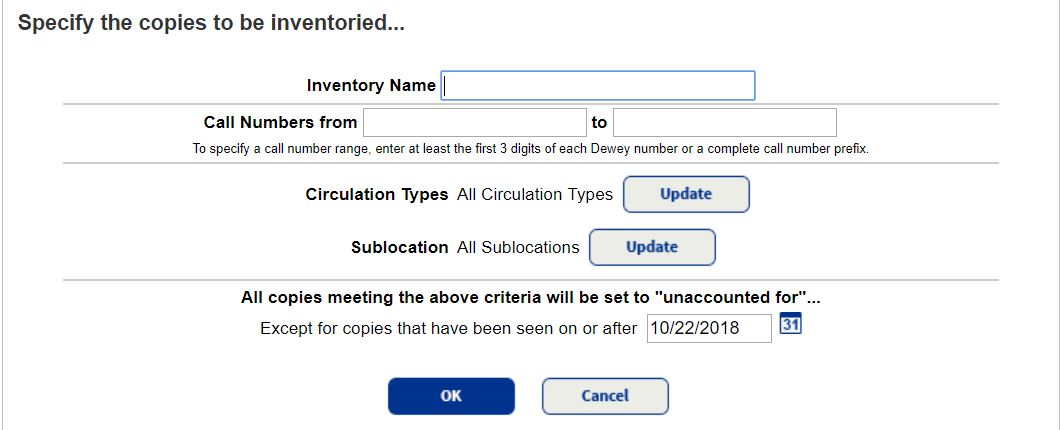
- To inventory your entire collection, leave the Call Numbers from and to fields blank. You can create an inventory for part of your collection, based on a title's full call number and not just its prefix. For example, for a fiction collection, you could just inventory FIC DAA to FIC EZZ.
- To limit your inventory to certain circulation types, such as new releases or audiovisual equipment, click Update next to Circulation Types. The default setting is All Circulation Types.
- To limit your inventory to certain location, genres or subject, click Update next to Sublocation. The default setting is All Sublocations.
- To exclude any items that library staff recently reviewed, enter a date in the Except for copies that have been seen on or after field. For example, entering a date three days ago lets you exclude any items recently checked in or out, or new materials that were cataloged in the last few days.
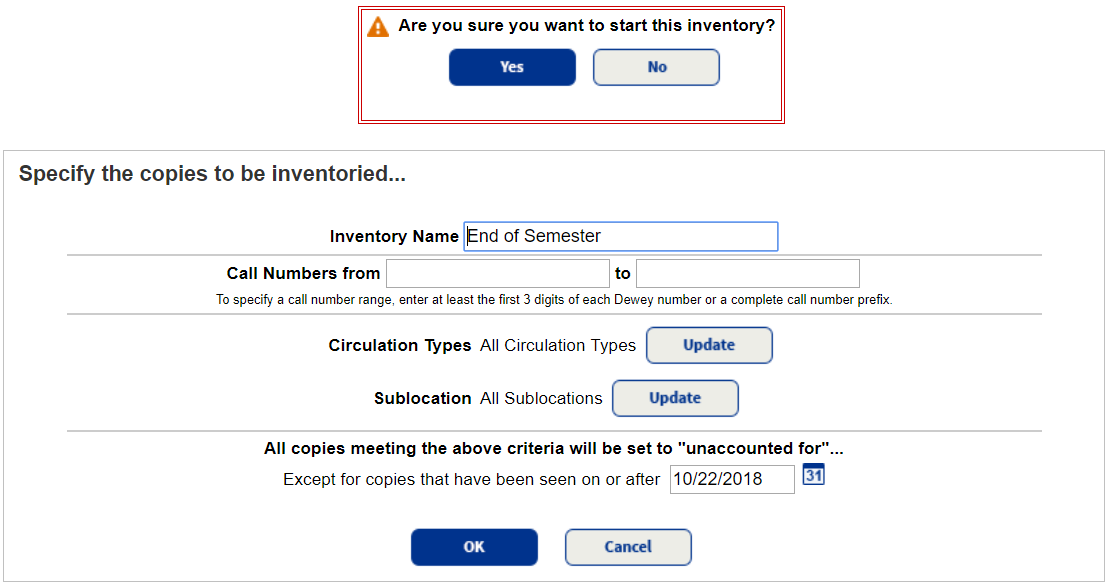
- After setting the inventory criteria, click OK. To begin the inventory, click Yes in the confirmation message .
|
Note: Once you start the inventory, you cannot edit the criteria or rename the inventory. |
You are now ready to start the scan/load library inventory barcodes process to make copies accounted for.